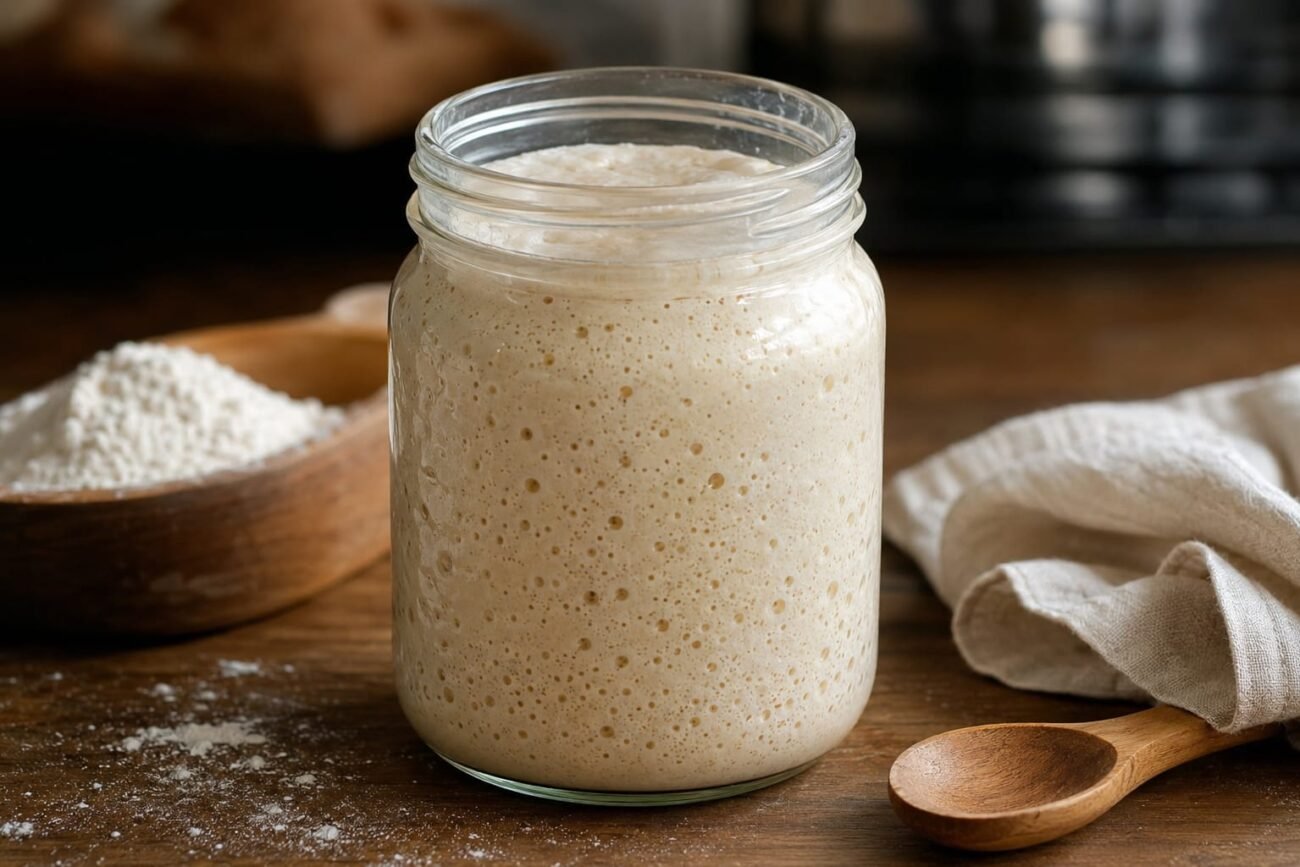
Making a sourdough starter at home is one of the simplest and most rewarding ways to begin baking naturally fermented bread. A healthy starter is made from just two basic ingredients: flour and water. With regular feeding and a little patience, wild yeast and beneficial bacteria naturally present in the flour begin to grow. The result is a bubbly, active starter that can be used to make sourdough bread, pancakes, waffles, crackers, pizza dough, and many other delicious recipes.
Ingredients
- 60 g whole wheat flour
- 60 g room-temperature water
- Additional flour and water for daily feedings
For best results, use unbleached flour. Whole wheat or rye flour is especially helpful during the first few days because it contains more nutrients and microorganisms that encourage fermentation. Filtered or bottled water is preferred if your tap water contains a high amount of chlorine.
Day 1: Mix the Starter
In a clean glass jar, combine 60 g whole wheat flour with 60 g room-temperature water. Stir thoroughly until no dry flour remains. The mixture should have a thick, paste-like consistency.
Cover the jar loosely with a lid or clean kitchen towel. Do not seal it tightly because fermentation produces gas that needs to escape.
Place the jar somewhere warm, ideally around 24–27°C (75–80°F). Avoid direct sunlight or very hot locations.
Leave the starter undisturbed for approximately 24 hours.
Day 2: First Feeding
After 24 hours, you may notice a few bubbles, a slightly sour smell, or very little activity. All of these can be normal.
Discard approximately half of the starter, leaving about 60 g in the jar. Add 60 g flour and 60 g water. Mix well until completely combined.
Cover loosely and return the jar to its warm location.
During the first few days, the starter may suddenly become very active. It might rise dramatically and then appear to slow down. This is normal and does not necessarily mean the starter is ready. Continue feeding it consistently.
Days 3–5: Continue Feeding
Repeat the same feeding process every 24 hours:
- Keep about 60 g starter.
- Add 60 g flour.
- Add 60 g water.
- Mix thoroughly.
- Cover loosely and let it ferment.
As the starter develops, you should begin seeing more bubbles throughout the mixture. Its aroma may become pleasantly tangy, fruity, yogurt-like, or mildly sour.
If your starter becomes very active and rises and falls quickly, you can begin feeding it twice a day. A starter that is hungry may develop a strong acidic smell or become very runny.
Days 6–7 and Beyond
By this point, your starter may be becoming more predictable. A mature starter should rise noticeably after feeding and develop bubbles throughout the mixture.
To test its strength, feed the starter and mark the level on the jar with a rubber band or washable marker. Watch how quickly it rises.
A strong starter can often double in volume within approximately 4–8 hours in a warm environment. Once it consistently rises and falls after feeding, it is generally ready to use for baking.
Keep in mind that every starter develops at a different speed. Some may become ready in one week, while others can take two weeks or longer. Temperature, flour type, water, and feeding schedule all affect fermentation.
How to Maintain Your Starter
Once your starter is active, you can maintain it according to how frequently you bake.
If you bake frequently, keep the starter at room temperature and feed it approximately every 12–24 hours.
If you bake only occasionally, store it in the refrigerator. Feed it, allow it to become active for a few hours, and then place it in the refrigerator.
When you’re ready to bake, remove it from the refrigerator and give it one or more room-temperature feedings until it becomes bubbly and active again.
How to Know Your Starter Is Ready
A healthy, active starter should have plenty of bubbles and should increase noticeably in volume after feeding. It may have a pleasant sour, slightly fruity, or fermented aroma.
The most reliable signs are consistent rising and falling rather than simply performing a float test. A starter that doubles predictably after feeding is usually a much better indication of readiness.
You can also look at the texture. An active starter often becomes lighter, airier, and full of bubbles.
Troubleshooting
If your starter is not bubbling, don’t panic. It may simply need more time. Keep it warm and continue with regular feedings.
If it becomes extremely watery, you can adjust the feeding ratio or use a little more flour. A thick pancake-batter-like consistency is a useful general guide.
If you notice a dark liquid forming on top, your starter may simply be hungry. Stir it in or pour it off, then feed the starter as usual.
However, if you see fuzzy mold or unusual pink, orange, or red discoloration, discard the starter and begin again with a clean jar and fresh ingredients.
Using Your Starter for Sourdough Bread
Once your starter is active, bubbly, and consistently rising, you can use it to make sourdough bread.
A basic loaf can be made with flour, water, active starter, and salt. The dough is mixed, allowed to ferment, shaped, proofed, and finally baked until beautifully golden brown.
The fermentation time depends on the temperature and strength of your starter, so learning to watch the dough rather than relying only on the clock is an important part of sourdough baking.
Helpful Tips for Success
Use a kitchen scale whenever possible because measuring flour and water by weight gives much more consistent results.
Keep your jar clean, but you do not need to sterilize it every day. If the sides become covered with dried starter, transfer the active starter to a clean jar.
Mark the starter’s level after feeding so you can easily see how much it rises.
Most importantly, be patient. Sourdough starter is a living culture, and it takes time to establish itself.
Once your starter is strong and active, those beautiful bubbles are a sign that fermentation is happening. That bubbly jar is the foundation for flavorful homemade sourdough bread and countless other sourdough creations.

