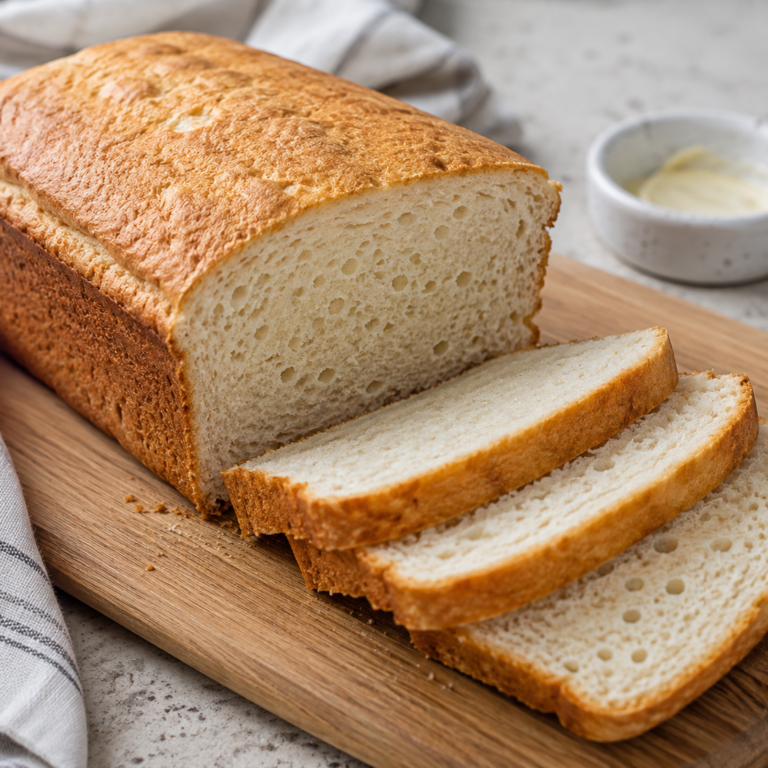
This homemade Gluten-Free Sandwich Bread is soft, tender, lightly golden on the outside, and perfect for everyday sandwiches, toast, breakfast, or snacks. If you have been looking for a gluten-free bread that is easy to slice and doesn’t require complicated ingredients, this recipe is a great place to start.
Unlike traditional wheat bread, gluten-free dough does not develop the same stretchy gluten network, so the mixture will look more like a thick, sticky batter than a traditional kneadable dough. That’s completely normal. The key is using the right gluten-free flour blend, enough moisture, and proper rising time.
Ingredients
- 3 cups gluten-free all-purpose flour blend
- 2 tablespoons psyllium husk powder
- 2¼ teaspoons instant yeast
- 2 tablespoons honey or maple syrup
- 1 teaspoon fine sea salt
- 1½ cups warm water
- 2 large eggs, room temperature
- 2 tablespoons olive oil or melted butter
- 1 teaspoon apple cider vinegar
Optional
- 1 tablespoon sesame seeds
- 1 tablespoon sunflower seeds
- 1 tablespoon poppy seeds
- ½ teaspoon garlic powder for a savory loaf
Important: Choose a gluten-free flour blend that is suitable for yeast baking and check all packaged ingredients for gluten-free labeling if you are preparing the bread for someone with celiac disease or a strict gluten-free diet.
Equipment
- 9 × 5-inch loaf pan
- Large mixing bowl
- Small bowl
- Measuring cups and spoons
- Whisk or wooden spoon
- Kitchen towel or plastic wrap
- Wire cooling rack
Step 1: Prepare the Pan
Lightly grease a 9 × 5-inch loaf pan with olive oil, butter, or gluten-free cooking spray.
You can also line the pan with parchment paper, leaving a little overhang on the long sides. This makes it easier to lift the bread out after baking.
Set the prepared pan aside.
Step 2: Activate the Yeast
Pour the warm water into a small bowl.
The water should feel warm but not hot.
Add the honey or maple syrup and yeast.
Stir gently and let the mixture sit for approximately 5–10 minutes.
If the yeast becomes slightly foamy, it is active and ready to use.
If there is no sign of activity after 10 minutes, the yeast may be inactive or the water temperature may not have been suitable.
Step 3: Combine the Dry Ingredients
In a large mixing bowl, whisk together:
- Gluten-free flour
- Psyllium husk powder
- Salt
Mix thoroughly so the psyllium and salt are evenly distributed throughout the flour.
Psyllium husk is especially useful in gluten-free bread because it helps provide structure and gives the loaf a softer, more flexible texture.
Step 4: Add the Wet Ingredients
Add the eggs, olive oil, apple cider vinegar, and activated yeast mixture to the dry ingredients.
Using a wooden spoon or sturdy spatula, mix everything together.
The mixture will be sticky and thick.
Don’t try to knead it like traditional wheat bread. Gluten-free bread doesn’t need traditional kneading.
Mix for approximately 2–3 minutes, making sure there are no dry pockets of flour.
Step 5: Transfer to the Pan
Scrape the dough into the prepared loaf pan.
Use a wet spatula or the back of a spoon to smooth the top.
Because gluten-free bread dough can be sticky, lightly wetting your spatula makes this step much easier.
Try to spread the dough evenly from corner to corner.
If desired, sprinkle sesame seeds, sunflower seeds, or poppy seeds over the top.
Step 6: Let the Bread Rise
Cover the loaf pan loosely with a clean kitchen towel or plastic wrap.
Place it somewhere warm and draft-free.
Allow the bread to rise for approximately 45–75 minutes.
The exact time depends on the temperature of your kitchen and the activity of your yeast.
The dough should become visibly puffier and rise close to the top of the loaf pan.
Avoid letting it rise excessively because an over-proofed gluten-free loaf can collapse during baking.
Step 7: Preheat the Oven
When the dough is nearly finished rising, preheat your oven to 375°F (190°C).
Allow the oven to fully preheat before placing the bread inside.
A properly preheated oven helps the bread rise and set correctly.
Step 8: Bake
Place the loaf in the center of the preheated oven.
Bake for approximately 40–50 minutes.
The top should become golden brown and firm.
If the top begins browning too quickly, loosely cover it with aluminum foil during the final part of baking.
The internal temperature should generally be around 200–205°F (93–96°C) when the bread is fully baked.
Step 9: Cool the Bread
Remove the loaf from the oven and allow it to cool in the pan for about 10 minutes.
Then carefully lift the bread out and transfer it to a wire rack.
Allow it to cool completely before slicing.
This is one of the most important steps.
Gluten-free bread continues to set as it cools, so cutting it while it’s still hot can make the inside appear gummy or cause the slices to fall apart.
For the cleanest slices, wait until the loaf is completely cool.
How to Serve Gluten-Free Sandwich Bread
Once cooled, this bread can be used in many different ways.
Classic Sandwich
Use two slices with turkey, chicken, cheese, lettuce, tomato, and your favorite gluten-free condiments.
Breakfast Toast
Toast a slice and top it with butter, avocado, scrambled eggs, or peanut butter.
Grilled Cheese
Place cheese between two slices and cook in a skillet with butter until golden and melted.
Peanut Butter and Banana
Spread peanut butter over toasted bread and add sliced banana with a light drizzle of honey.
Avocado Toast
Mash avocado onto toasted bread and add salt, pepper, and a squeeze of lemon.
Tips for the Best Gluten-Free Bread
Use the Right Flour
Not every gluten-free flour blend works equally well for yeast bread.
A blend containing ingredients such as rice flour, tapioca starch, potato starch, or other gluten-free starches can provide a good structure.
Don’t Add Too Much Flour
Gluten-free bread needs moisture.
Adding extra flour because the dough looks sticky can result in a dry, dense loaf.
The mixture should be thick and sticky rather than dry and kneadable.
Measure Carefully
For the most consistent results, measuring flour by weight is preferable when possible.
If using cups, spoon the flour into the measuring cup and level the top rather than packing it down.
Give It Enough Time to Rise
The dough should become noticeably puffy before baking.
However, avoid letting it rise too much.
Let It Cool Completely
This is especially important with gluten-free bread. A full cooling period helps the crumb become firm enough to slice cleanly.
Storage
Once completely cooled, store the bread in an airtight container or bread bag at room temperature.
For the best texture, enjoy it within several days.
You can also slice the entire loaf and freeze individual slices.
Place parchment paper between slices if desired, then store them in a freezer-safe bag or container.
Frozen slices can be placed directly into a toaster when you’re ready to enjoy them.
Troubleshooting
Bread Is Too Dense
This can happen if the yeast isn’t active, the dough didn’t rise enough, or too much flour was added.
Make sure your yeast is fresh and allow the dough enough time to become noticeably puffy.
Bread Collapsed
The bread may have been over-proofed or the center may not have been fully baked.
Try reducing the rising time and make sure the loaf reaches the appropriate internal temperature.
Bread Is Gummy
Allow it to cool completely before slicing.
If it remains gummy after cooling, it may need additional baking time or the dough may have contained too much moisture.
Bread Is Dry
Too much flour or insufficient liquid can produce a dry loaf.
Gluten-free bread generally needs more hydration than traditional wheat bread.
Final Thoughts
This Gluten-Free Sandwich Bread is a practical homemade option for anyone who wants a soft loaf that can be sliced and used for everyday meals. It works beautifully for sandwiches, toast, grilled cheese, breakfast, and simple snacks.
The recipe is straightforward: combine the gluten-free flour with psyllium, yeast, and seasonings, add the wet ingredients, let the dough rise, and bake until golden and fully cooked.
Once you get comfortable with the basic recipe, you can experiment with seeds, herbs, garlic, or other gluten-free additions to create your own favorite version.
For the best results, remember the three most important things: use an appropriate gluten-free flour blend, don’t add unnecessary extra flour, and allow the bread to cool completely before slicing.
With those simple tips, you can enjoy fresh, homemade gluten-free sandwich bread with a soft crumb and delicious homemade flavor.

