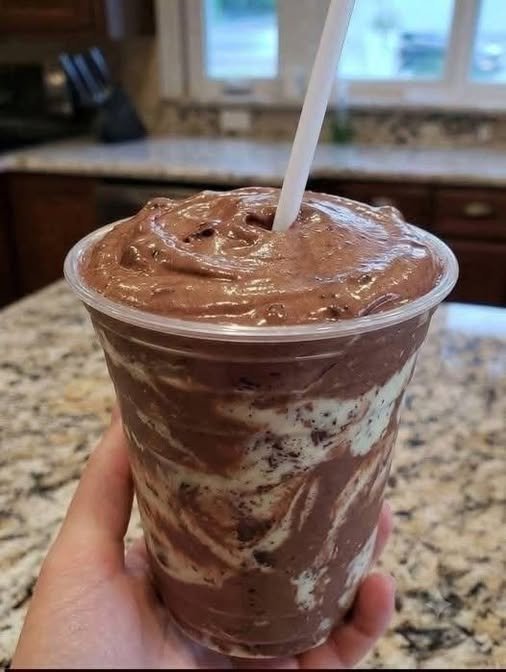
If you are craving something rich, creamy, and deeply chocolatey but don’t want a heavy dessert, this Low Carb Gluten-Free Chocolate Mousse is a simple recipe to keep on hand. It has a smooth, airy texture and plenty of chocolate flavor, while using ingredients that can fit into a low-carb lifestyle.
The best part is that this mousse doesn’t require complicated equipment. A hand mixer or stand mixer is enough to create the light texture, and the preparation takes only a few simple steps.
Serve it in small dessert glasses for an elegant finish, or keep it in the refrigerator and enjoy it whenever a chocolate craving hits.
Why You’ll Love This Chocolate Mousse
This mousse is rich without being overly complicated.
Unsweetened chocolate and cocoa powder give it a deep chocolate flavor, while heavy cream creates the creamy texture that makes mousse so enjoyable.
A low-carb sweetener can be adjusted according to your taste, so you can make the mousse mildly sweet or more dessert-like.
Because the recipe contains no traditional wheat flour or other gluten-containing ingredients, it can be suitable for a gluten-free dessert. However, if you are preparing it for someone with celiac disease or a strict gluten-free diet, always check the labels of packaged ingredients for gluten or cross-contact information.
The mousse is also easy to prepare ahead of time, making it useful when you want dessert ready before guests arrive.
Ingredients
For the Chocolate Mousse
- 1 cup heavy whipping cream
- 3 ounces unsweetened or very dark chocolate, finely chopped
- 2 tablespoons unsweetened cocoa powder
- 2–3 tablespoons powdered low-carb sweetener, to taste
- 1 teaspoon vanilla extract
- 1 tablespoon unsalted butter
- A small pinch of salt
Optional Toppings
- Unsweetened whipped cream
- A light dusting of cocoa powder
- Sugar-free chocolate shavings
- A few fresh raspberries or strawberries
- Chopped almonds or walnuts
- Unsweetened coconut flakes
Choose a low-carb sweetener that dissolves well. Powdered sweetener generally works better than a coarse granulated variety because it creates a smoother mousse.
Step 1: Prepare the Chocolate
Finely chop the chocolate and place it in a heat-safe bowl.
The smaller the pieces, the more easily they will melt.
Add the butter to the chocolate.
You can melt the chocolate gently using a double boiler, or microwave it in short intervals.
If using a microwave, heat for about 15–20 seconds at a time, stirring well between each interval.
Do not overheat the chocolate.
Once it is almost completely melted, continue stirring until the remaining small pieces disappear from the residual heat.
Set the melted chocolate aside for a few minutes so it can cool slightly.
Step 2: Add the Cocoa Powder
Sift the unsweetened cocoa powder into the melted chocolate.
Add the pinch of salt and stir until smooth.
The cocoa powder intensifies the chocolate flavor and gives the finished mousse a richer color.
If the mixture becomes very thick, don’t worry. The whipped cream will loosen it later.
Step 3: Whip the Cream
Pour the cold heavy whipping cream into a clean mixing bowl.
Using a hand mixer or stand mixer, begin beating on medium speed.
As the cream starts to thicken, add the powdered low-carb sweetener gradually.
Add the vanilla extract.
Continue whipping until soft-to-medium peaks form.
The cream should hold its shape but still look smooth and creamy.
Avoid over-whipping because cream that becomes too stiff or grainy can make the finished mousse less smooth.
Step 4: Combine the Chocolate and Cream
Take about one-third of the whipped cream and add it to the cooled chocolate mixture.
Gently stir it in.
This first addition helps lighten the chocolate mixture and makes it easier to combine with the remaining whipped cream.
Add another portion of whipped cream.
This time, use a spatula and gently fold from the bottom of the bowl upward.
Continue until most of the chocolate is incorporated.
Add the remaining whipped cream and fold gently until you no longer see large white streaks.
Don’t stir aggressively.
The goal is to keep as much air as possible in the whipped cream. That air is what gives mousse its light texture.
Step 5: Taste and Adjust
Taste a small amount of the mousse before portioning it.
If you prefer a sweeter dessert, add a little more powdered low-carb sweetener.
If you want stronger chocolate flavor, you can add a small amount of additional cocoa powder.
Remember that the mousse will taste slightly different once chilled, so don’t over-adjust the sweetness.
Step 6: Portion the Mousse
Spoon the chocolate mousse into small dessert glasses, ramekins, or bowls.
For a cleaner presentation, transfer the mousse into a piping bag and pipe it into the serving glasses.
Smooth the tops with the back of a spoon or leave them slightly swirled for a homemade appearance.
Cover each serving loosely with plastic wrap.
Step 7: Chill
Place the mousse in the refrigerator for at least 2 hours.
Chilling allows the chocolate to set and gives the mousse a firmer, creamier texture.
For the best flavor, you can prepare it several hours ahead or leave it refrigerated overnight.
If you chill it overnight, allow it to sit at room temperature for a few minutes before serving if it feels especially firm.
Tips for the Best Chocolate Mousse
Use cold cream. Cold heavy cream whips more easily and creates better volume.
Don’t overheat the chocolate. High heat can cause chocolate to become thick or grainy.
Let the chocolate cool slightly. Hot chocolate can melt the whipped cream and make the mousse heavy.
Fold gently. Aggressive mixing removes the air that gives mousse its fluffy texture.
Use powdered sweetener. It usually blends more smoothly than coarse granulated sweetener.
Don’t rush the chilling time. The mousse becomes thicker and more stable as it chills.
Easy Variations
Peanut Butter Chocolate Mousse
Add 1–2 tablespoons of natural peanut butter to the melted chocolate.
Stir well before folding in the whipped cream.
The combination creates a rich chocolate-peanut butter dessert.
Mocha Chocolate Mousse
Add ½ teaspoon instant espresso powder to the melted chocolate.
Coffee enhances the chocolate flavor without necessarily making the mousse taste strongly like coffee.
Mint Chocolate Mousse
Add a very small amount of peppermint extract.
Start with just a drop or two because peppermint extract is powerful.
Raspberry Chocolate Mousse
Add a few fresh raspberries on top just before serving.
The slight tartness of the berries balances the richness of the chocolate.
Extra Dark Chocolate Mousse
Use a high-cocoa dark chocolate that contains little or no added sugar.
Check the nutrition label carefully if you are following a strict low-carb plan.
Serving Ideas
Serve the mousse chilled with a small spoonful of unsweetened whipped cream.
For a simple finish, add a light dusting of cocoa powder.
You can also add a few chocolate shavings, chopped nuts, or a couple of berries.
For dinner parties, serve the mousse in small clear glasses so the creamy chocolate layers are visible.
Because the mousse is rich, smaller portions are often enough.
Storage
Store leftover mousse covered in the refrigerator.
It is best enjoyed within about 3 days for the freshest texture and flavor.
Keep the mousse refrigerated until you are ready to serve.
Avoid leaving it at room temperature for long periods because it contains dairy and can soften considerably.
Make-Ahead Instructions
This recipe is excellent for preparing ahead.
Make the mousse the night before, portion it into serving glasses, cover, and refrigerate.
Add toppings just before serving.
If you’re preparing the mousse for a gathering, keeping the toppings separate until serving helps maintain their texture and appearance.
Final Thoughts
This Low Carb Gluten-Free Chocolate Mousse is a simple dessert that feels much more special than the effort required to make it.
The combination of melted chocolate, cocoa, whipped cream, vanilla, and a low-carb sweetener creates a smooth and rich dessert with a light mousse texture.
The key to getting the best result is to work gently: allow the chocolate to cool before combining it with the whipped cream, fold rather than stir, and give the mousse enough time to chill.
Once you have the basic recipe down, it’s easy to make your own variations with peanut butter, coffee, berries, or mint.
For a simple chocolate dessert that can be prepared ahead of time and served straight from the refrigerator, this mousse is an easy recipe to keep in your collection.
Low Carb Gluten-Free Chocolate Mousse
If you are craving something rich, creamy, and deeply chocolatey but don’t want a heavy dessert, this Low Carb Gluten-Free Chocolate Mousse is a simple recipe to keep on hand. It has a smooth, airy texture and plenty of chocolate flavor, while using ingredients that can fit into a low-carb lifestyle.
The best part is that this mousse doesn’t require complicated equipment. A hand mixer or stand mixer is enough to create the light texture, and the preparation takes only a few simple steps.
Serve it in small dessert glasses for an elegant finish, or keep it in the refrigerator and enjoy it whenever a chocolate craving hits.
Why You’ll Love This Chocolate Mousse
This mousse is rich without being overly complicated.
Unsweetened chocolate and cocoa powder give it a deep chocolate flavor, while heavy cream creates the creamy texture that makes mousse so enjoyable.
A low-carb sweetener can be adjusted according to your taste, so you can make the mousse mildly sweet or more dessert-like.
Because the recipe contains no traditional wheat flour or other gluten-containing ingredients, it can be suitable for a gluten-free dessert. However, if you are preparing it for someone with celiac disease or a strict gluten-free diet, always check the labels of packaged ingredients for gluten or cross-contact information.
The mousse is also easy to prepare ahead of time, making it useful when you want dessert ready before guests arrive.
Ingredients
For the Chocolate Mousse
- 1 cup heavy whipping cream
- 3 ounces unsweetened or very dark chocolate, finely chopped
- 2 tablespoons unsweetened cocoa powder
- 2–3 tablespoons powdered low-carb sweetener, to taste
- 1 teaspoon vanilla extract
- 1 tablespoon unsalted butter
- A small pinch of salt
Optional Toppings
- Unsweetened whipped cream
- A light dusting of cocoa powder
- Sugar-free chocolate shavings
- A few fresh raspberries or strawberries
- Chopped almonds or walnuts
- Unsweetened coconut flakes
Choose a low-carb sweetener that dissolves well. Powdered sweetener generally works better than a coarse granulated variety because it creates a smoother mousse.
Step 1: Prepare the Chocolate
Finely chop the chocolate and place it in a heat-safe bowl.
The smaller the pieces, the more easily they will melt.
Add the butter to the chocolate.
You can melt the chocolate gently using a double boiler, or microwave it in short intervals.
If using a microwave, heat for about 15–20 seconds at a time, stirring well between each interval.
Do not overheat the chocolate.
Once it is almost completely melted, continue stirring until the remaining small pieces disappear from the residual heat.
Set the melted chocolate aside for a few minutes so it can cool slightly.
Step 2: Add the Cocoa Powder
Sift the unsweetened cocoa powder into the melted chocolate.
Add the pinch of salt and stir until smooth.
The cocoa powder intensifies the chocolate flavor and gives the finished mousse a richer color.
If the mixture becomes very thick, don’t worry. The whipped cream will loosen it later.
Step 3: Whip the Cream
Pour the cold heavy whipping cream into a clean mixing bowl.
Using a hand mixer or stand mixer, begin beating on medium speed.
As the cream starts to thicken, add the powdered low-carb sweetener gradually.
Add the vanilla extract.
Continue whipping until soft-to-medium peaks form.
The cream should hold its shape but still look smooth and creamy.
Avoid over-whipping because cream that becomes too stiff or grainy can make the finished mousse less smooth.
Step 4: Combine the Chocolate and Cream
Take about one-third of the whipped cream and add it to the cooled chocolate mixture.
Gently stir it in.
This first addition helps lighten the chocolate mixture and makes it easier to combine with the remaining whipped cream.
Add another portion of whipped cream.
This time, use a spatula and gently fold from the bottom of the bowl upward.
Continue until most of the chocolate is incorporated.
Add the remaining whipped cream and fold gently until you no longer see large white streaks.
Don’t stir aggressively.
The goal is to keep as much air as possible in the whipped cream. That air is what gives mousse its light texture.
Step 5: Taste and Adjust
Taste a small amount of the mousse before portioning it.
If you prefer a sweeter dessert, add a little more powdered low-carb sweetener.
If you want stronger chocolate flavor, you can add a small amount of additional cocoa powder.
Remember that the mousse will taste slightly different once chilled, so don’t over-adjust the sweetness.
Step 6: Portion the Mousse
Spoon the chocolate mousse into small dessert glasses, ramekins, or bowls.
For a cleaner presentation, transfer the mousse into a piping bag and pipe it into the serving glasses.
Smooth the tops with the back of a spoon or leave them slightly swirled for a homemade appearance.
Cover each serving loosely with plastic wrap.
Step 7: Chill
Place the mousse in the refrigerator for at least 2 hours.
Chilling allows the chocolate to set and gives the mousse a firmer, creamier texture.
For the best flavor, you can prepare it several hours ahead or leave it refrigerated overnight.
If you chill it overnight, allow it to sit at room temperature for a few minutes before serving if it feels especially firm.
Tips for the Best Chocolate Mousse
Use cold cream. Cold heavy cream whips more easily and creates better volume.
Don’t overheat the chocolate. High heat can cause chocolate to become thick or grainy.
Let the chocolate cool slightly. Hot chocolate can melt the whipped cream and make the mousse heavy.
Fold gently. Aggressive mixing removes the air that gives mousse its fluffy texture.
Use powdered sweetener. It usually blends more smoothly than coarse granulated sweetener.
Don’t rush the chilling time. The mousse becomes thicker and more stable as it chills.
Easy Variations
Peanut Butter Chocolate Mousse
Add 1–2 tablespoons of natural peanut butter to the melted chocolate.
Stir well before folding in the whipped cream.
The combination creates a rich chocolate-peanut butter dessert.
Mocha Chocolate Mousse
Add ½ teaspoon instant espresso powder to the melted chocolate.
Coffee enhances the chocolate flavor without necessarily making the mousse taste strongly like coffee.
Mint Chocolate Mousse
Add a very small amount of peppermint extract.
Start with just a drop or two because peppermint extract is powerful.
Raspberry Chocolate Mousse
Add a few fresh raspberries on top just before serving.
The slight tartness of the berries balances the richness of the chocolate.
Extra Dark Chocolate Mousse
Use a high-cocoa dark chocolate that contains little or no added sugar.
Check the nutrition label carefully if you are following a strict low-carb plan.
Serving Ideas
Serve the mousse chilled with a small spoonful of unsweetened whipped cream.
For a simple finish, add a light dusting of cocoa powder.
You can also add a few chocolate shavings, chopped nuts, or a couple of berries.
For dinner parties, serve the mousse in small clear glasses so the creamy chocolate layers are visible.
Because the mousse is rich, smaller portions are often enough.
Storage
Store leftover mousse covered in the refrigerator.
It is best enjoyed within about 3 days for the freshest texture and flavor.
Keep the mousse refrigerated until you are ready to serve.
Avoid leaving it at room temperature for long periods because it contains dairy and can soften considerably.
Make-Ahead Instructions
This recipe is excellent for preparing ahead.
Make the mousse the night before, portion it into serving glasses, cover, and refrigerate.
Add toppings just before serving.
If you’re preparing the mousse for a gathering, keeping the toppings separate until serving helps maintain their texture and appearance.
Final Thoughts
This Low Carb Gluten-Free Chocolate Mousse is a simple dessert that feels much more special than the effort required to make it.
The combination of melted chocolate, cocoa, whipped cream, vanilla, and a low-carb sweetener creates a smooth and rich dessert with a light mousse texture.
The key to getting the best result is to work gently: allow the chocolate to cool before combining it with the whipped cream, fold rather than stir, and give the mousse enough time to chill.
Once you have the basic recipe down, it’s easy to make your own variations with peanut butter, coffee, berries, or mint.
For a simple chocolate dessert that can be prepared ahead of time and served straight from the refrigerator, this mousse is an easy recipe to keep in your collection.

