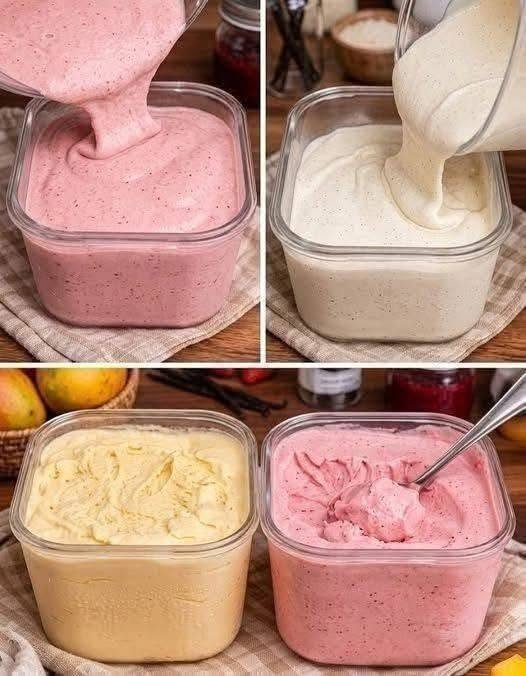
Homemade ice cream does not need an ice cream machine, a custard, or any complicated steps. This No-Churn Ice Cream is made with just three basic ingredients: whipped cream, sweetened condensed milk, and vanilla. From that one creamy base, you can make vanilla, strawberry, mango, or any flavor you like.
The texture is smooth, rich, and scoopable straight from the freezer. You simply whip, fold, pour into a container, and let the freezer do the work. It is a great recipe for hot summer days, birthday parties, or a simple dessert after dinner.
Why You’ll Love This Ice Cream
Making ice cream at home is easier than most people think. There is no cooking, no special equipment other than a mixer, and no need to stir the ice cream while it freezes.
The base recipe is very flexible. One batch can be split into two or three containers, so you can make several flavors at the same time. You can also control the sweetness and choose real fruit, which gives a fresh flavor you cannot get from many store-bought options.
It is also a great make-ahead dessert. Prepare it in the morning, and it is ready to serve in the evening.
Ingredients
For the Vanilla Base
- 2 cups cold heavy whipping cream
- 1 can (14 oz / 397 g) sweetened condensed milk, chilled
- 2 teaspoons pure vanilla extract
- Small pinch of salt
For Strawberry Ice Cream
- 1 cup strawberries, fresh or thawed frozen
- 1 tablespoon sugar (optional, if the berries are tart)
- 1 teaspoon lemon juice
For Mango Ice Cream
- 1 cup ripe mango pulp or chopped mango
- 1 teaspoon lemon juice
Optional Mix-Ins
- Chocolate chips
- Crushed cookies
- Chopped nuts
- Shredded coconut
- A swirl of caramel or fruit jam
How to Make No-Churn Ice Cream
Step 1: Chill Your Tools
Place your mixing bowl and beaters in the freezer for 15 minutes. Cold equipment helps the cream whip faster and hold more air, which makes the ice cream light and creamy.
Keep the heavy cream in the refrigerator until the moment you use it. Warm cream will not whip properly.
Step 2: Prepare the Fruit Purees
For strawberry, blend the strawberries with sugar and lemon juice until smooth. For mango, blend the mango with lemon juice. If you want a smoother texture, strain the puree through a sieve to remove seeds or fibers.
Set the purees aside. If they are very watery, simmer them for 5 to 8 minutes to reduce, then cool completely. Thick purees make creamier ice cream, while watery ones can form ice crystals.
Step 3: Whip the Cream
Pour the cold heavy cream into the chilled bowl. Beat on medium-high speed until stiff peaks form. This usually takes 3 to 5 minutes.
The cream should hold its shape when you lift the beaters. Stop mixing as soon as you reach this stage. If you whip too long, the cream can turn grainy.
Step 4: Mix the Condensed Milk
In a separate large bowl, stir together the sweetened condensed milk, vanilla extract, and a pinch of salt until smooth.
Step 5: Fold Everything Together
Add about one-third of the whipped cream to the condensed milk mixture and stir gently to lighten it. Then add the remaining whipped cream and fold carefully with a spatula.
Use slow, gentle movements, scooping from the bottom and folding over the top. Stop when no white streaks remain. Do not stir hard, because you want to keep as much air in the mixture as possible.
Step 6: Divide and Flavor
Divide the base into separate bowls, depending on how many flavors you want to make. Leave one portion plain for vanilla.
Gently fold the strawberry puree into one bowl and the mango puree into another. For a marbled look, fold only a few times and leave visible swirls.
Step 7: Freeze
Pour each flavor into a freezer-safe container, such as a loaf pan or an airtight plastic or glass container. Smooth the top with a spatula.
Cover the surface with parchment paper or plastic wrap, pressing it lightly onto the ice cream to prevent ice crystals. Add the lid and freeze for at least 6 hours, or overnight, until firm.
Step 8: Serve
Take the ice cream out of the freezer and let it sit on the counter for 5 to 10 minutes. This softens it slightly and makes scooping easier. Use a scoop dipped in warm water for neat, round scoops.
Tips for the Creamiest Ice Cream
Use very cold cream. Cold cream whips better and gives a lighter result.
Do not over-whip. Stop at stiff peaks. Over-whipped cream turns buttery.
Fold gently. Rough mixing removes the air, and the ice cream can turn dense.
Keep the fruit puree thick. Too much liquid creates icy texture.
Cover the surface. Parchment or plastic wrap directly on the ice cream protects against freezer burn and ice crystals.
Chill the condensed milk. Cold ingredients help keep the mixture light and stable.
Add mix-ins last. Fold in chocolate chips, nuts, or cookies at the end so they stay evenly spread.
Flavor Ideas
Chocolate
Stir 1/3 cup unsweetened cocoa powder into the condensed milk before folding in the cream. Add chocolate chips for extra texture.
Mango Coconut
Use mango puree and add 1/2 cup shredded coconut.
Strawberry Cheesecake
Add 1/2 cup softened cream cheese to the condensed milk and fold in crushed graham crackers.
Cookies and Cream
Fold in crushed chocolate sandwich cookies.
Cinnamon Banana
Mash two ripe bananas, add 1/2 teaspoon of cinnamon, and fold into the base.
Coffee
Dissolve 2 tablespoons of instant coffee in 1 tablespoon of hot water, cool, and mix into the condensed milk.
How to Serve
This ice cream is delicious on its own, but there are many fun ways to serve it:
- In cones or cups with a drizzle of honey or chocolate sauce
- With fresh fruit on top
- Between two cookies as ice cream sandwiches
- Next to a slice of warm cake or brownie
- In a milkshake, blended with a little cold milk
- In a layered dessert glass with fruit and crushed biscuits
Storage
Store the ice cream in an airtight container in the freezer for up to 2 weeks for the best texture. Keep the surface covered with parchment paper each time you take some out.
If it becomes very hard, let it sit at room temperature for 10 minutes before scooping.
Store each flavor in its own container, so the flavors do not mix and the smells of other foods do not transfer.
Frequently Asked Questions
Can I make this without an ice cream machine?
Yes. This is a no-churn recipe, which means no machine is needed. Whipped cream gives the air that a machine normally adds.
Can I use milk instead of heavy cream?
No. Regular milk will not whip. You need heavy or whipping cream with at least 35 percent fat for the right texture.
Can I use whipped topping from a tub?
You can, but the flavor and texture will be different. Real whipped cream gives a richer and creamier ice cream.
Why is my ice cream icy?
Common reasons are watery fruit puree, over-stirring, or not covering the surface in the freezer. Use thick puree, fold gently, and cover well.
Why is my ice cream too hard?
Homemade ice cream is firmer than store-bought because it has no stabilizers. Let it soften at room temperature for a few minutes before serving.
Can I use frozen fruit?
Yes. Thaw the fruit first, then drain and puree it. Frozen fruit is a good option when fresh fruit is out of season.
Can I reduce the sugar?
The condensed milk provides both sweetness and creamy texture, so it is hard to reduce without changing the result. You can skip the extra sugar in the fruit puree if the fruit is sweet.
Can I make it in advance?
Yes. It is best made at least 6 hours ahead, and it keeps well in the freezer for up to 2 weeks.
Final Thoughts
No-Churn Homemade Ice Cream is one of the simplest desserts you can make, and it always feels special. With just cream, condensed milk, and vanilla, you can create a smooth and creamy base, then turn it into strawberry, mango, or any flavor your family loves.
Make a few containers, label them, and keep them in the freezer for a quick dessert whenever you want something cold and sweet.

